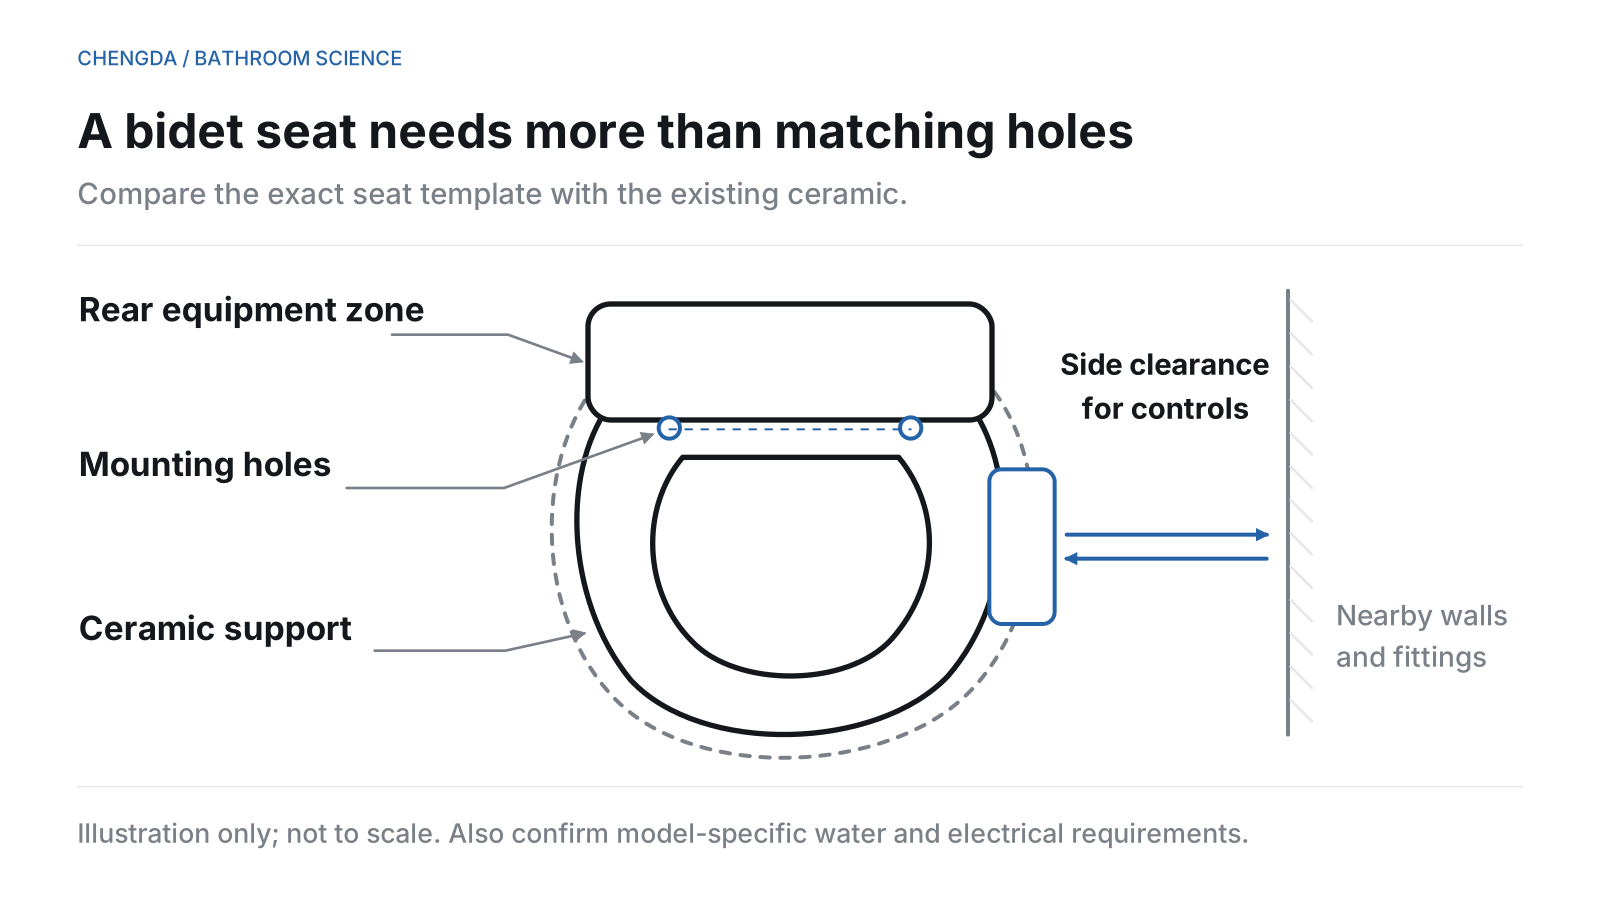
Many existing toilets can accept a suitable bidet seat, but matching the bowl shape and two bolt holes is only the starting point. The rear housing must clear the ceramic, the seat must rest correctly, and the mounting and service connections must be suitable for that exact installation.
Treat compatibility as a match between three things: your existing toilet, the precise seat model, and the bathroom where it will operate. Here is how to find the conflicts before removing a usable seat or ordering an upgrade.
01 UNDERSTAND YOUR BATHROOM
Start with two model numbers, not a universal fit claim
Find the toilet model and the proposed bidet-seat model, including its regional version. Ask for the current compatibility list and installation drawing for that pair. A product photo or the word elongated cannot confirm the rear profile, fixing arrangement or service route. TOTO’s fit chart shows named combinations and warns that some tank-to-bowl contours prevent installation.
If you need the basic measuring method, use our toilet-seat measurement guide. This retrofit check begins after those dimensions are known. Keep a photograph of the actual toilet alongside the drawing: an unidentified replacement cistern or seat can make a familiar-looking model misleading.
| Check | Evidence to request |
|---|---|
| Body and opening path | Exact seat drawing against the actual ceramic |
| Support and fastening | Approved support points and mounting kit |
| Water and electricity | Model requirements checked against the site |
| Installation decision | Written confirmation of the pairing and remaining work |
02 UNDERSTAND YOUR BATHROOM
Look behind the bolt holes and along the lid’s opening path
An electronic seat has a rear body that an ordinary seat may not have. Check the tank face, projecting cistern lid, curved ceramic shoulders and any nearby shelf against the proposed body. Brondell specifically flags angled tanks and protruding tank covers, with different clearance requirements for different models. Brondell’s fit guide is useful evidence that one clearance number cannot be applied to every seat.
Ask the supplier to check the complete opening path, not only the closed outline. Include side controls, nearby walls and access for cleaning or release. Mark any possible contact on the photograph rather than assuming the seat can simply move forward: that movement also changes its position over the bowl. Our round versus elongated guide explains the shape labels, but a label does not settle these conflicts.
03 UNDERSTAND YOUR BATHROOM
Check where the seat actually rests on the ceramic
A seat can line up with the holes while its underside support points miss the intended ceramic surface. Have the supplier compare the mounting base and support-pad positions with the bowl’s top surface. A curved shoulder, step or narrow ledge needs a specific answer; photographs taken only with the old seat closed will hide it.
For a concrete example, the Geberit AquaClean 4000 manual warns that uneven contact of its compensation pads can damage the product. That is a reason to verify support on the proposed pairing, not permission to add generic spacers. Ask whether the manufacturer provides an approved solution. If it cannot confirm stable support without improvised packing, treat the combination as unresolved and choose another seat or a documented toilet-and-seat pairing.
04 UNDERSTAND YOUR BATHROOM
Can the correct fixing kit actually be installed?
Bottom fixing needs access beneath the mounting holes to secure the specified hardware. With a skirted or enclosed bowl, that space may be inaccessible. Top fixing uses an arrangement installed from above, but the words top mount do not mean every insert fits every hole. Brondell’s IS707 manual illustrates different fastening arrangements; use it only for the models it covers.
Photograph the underside or access openings, if safely visible, and ask which kit is approved for both the seat bracket and the existing ceramic. Confirm whether the old hardware must be removed and how it will be reached. Do not order an arbitrary expanding plug or assume the ordinary seat bolts can be reused. The useful answer includes a kit reference and an installation method, not just a promise that the holes are adjustable.
05 UNDERSTAND YOUR BATHROOM
Trace the water connection before assuming it is accessible
On some toilets the cistern supply connection is easy to reach; on others it is concealed behind the pan. Brondell’s installation FAQ describes approved alternative T-valve arrangements for certain skirted installations. This demonstrates why a standard box of fittings may not complete every retrofit. Ask the installer to confirm the connection point, compatible fittings, hose route and access for future isolation or servicing.
Also distinguish a visible retrofit connection from a fully concealed installation. TOTO’s upgrade-ready toilet guidance relies on dedicated openings in selected ceramics. A clean promotional photograph is not evidence that your existing toilet has that route. Do not drill the ceramic to reproduce it. For the differences in concealed bowl construction, see our close-coupled versus back-to-wall guide.
06 UNDERSTAND YOUR BATHROOM
Check the regional electrical model and local installation requirements
Give the installer the exact seat’s electrical label and manual. Check rated supply, required protection, outlet position and cord reach together with the specified water conditions. TOTO’s US installation guide ties these requirements to the product and warns against an incorrect power supply. A plug that can be made to connect does not establish electrical compatibility; arrange an appropriate supply instead of improvising adapters.
Local requirements still apply after the seat physically fits. In Hong Kong, EMSD identifies installation or relocation of sockets as fixed electrical work for registered electrical contractors. Ask the local qualified installer to confirm the bathroom arrangement before booking installation.
Water protection also depends on jurisdiction. Water Regs UK’s combined WC-bidet checklist addresses backflow protection and notification or consent considerations. This is a UK example, not a universal approval rule. Have the installer check the exact product and local water-supplier requirements; the presence of a supplied T-piece alone does not answer that question.
07 UNDERSTAND YOUR BATHROOM
Get a clear fit decision before buying
Send one concise information pack: toilet identification, seat identification, the relevant drawing, top and side photographs, visible fixing access, and the intended water and electrical locations. Ask the reviewer to identify every unresolved item. Separate a confirmed physical fit from work still needed at the property, so a necessary socket or plumbing change is included in the decision.
A useful result is either an approved pairing with specified parts and site work, a request for missing evidence, or a rejected pairing with the interference identified. TOTO Europe’s FAQ illustrates why regional product combinations and connection provisions matter. If you are still deciding between a replacement toilet and a retrofit, our smart versus regular toilet comparison covers that wider choice.
Technical references
- TOTO USA — WASHLET Fit Chart
- Brondell — Fit & Measurement Guide: Toilet Compatibility
- Geberit — AquaClean 4000 user manual, revision 04
- Brondell — Swash IS707 owner manual
- Brondell — Flush Installation & Compatibility FAQ
- TOTO Europe — FAQs and our answers
- TOTO Europe — Upgrade to WASHLET
- TOTO USA — WASHLET installation guide D07877
- Water Regs UK — Combined WC bidets checklist
- Hong Kong EMSD — Only Registered Electrical Contractors Can Carry Out Electrical Works
FAQ COMMON QUESTIONS
Frequently asked questions
Will an elongated bidet seat fit every elongated toilet?
No. Shape is an initial filter. Rear-body clearance, ceramic support, mounting access and service connections must also match the exact model. Use the current manufacturer drawing and compatibility confirmation.
Can I fit a bidet seat to a skirted toilet?
Sometimes. The key questions are whether approved top-fixing hardware can be installed and whether an approved water connection is accessible. Ask for the actual kit references and route before ordering.
Can extra bumpers or spacers solve a support gap?
Only use a support arrangement approved for the specific seat and toilet pairing. Do not make a rocking seat appear secure with improvised packing. Ask the manufacturer to confirm the contact points.
Does the seat need a separate hot-water pipe?
Read the exact model instructions rather than assuming. Water temperature, pressure and connection requirements belong to that product. Ask the installer to confirm the specified supply without adapting from another model’s diagram.
Does adding a washing seat automatically add automatic flushing?
No. Treat flushing compatibility as a separate question for the seat, toilet and flushing system. A seat’s washing functions and physical fit do not establish that a flush actuator is included or compatible.
NEXT · RELATED READING