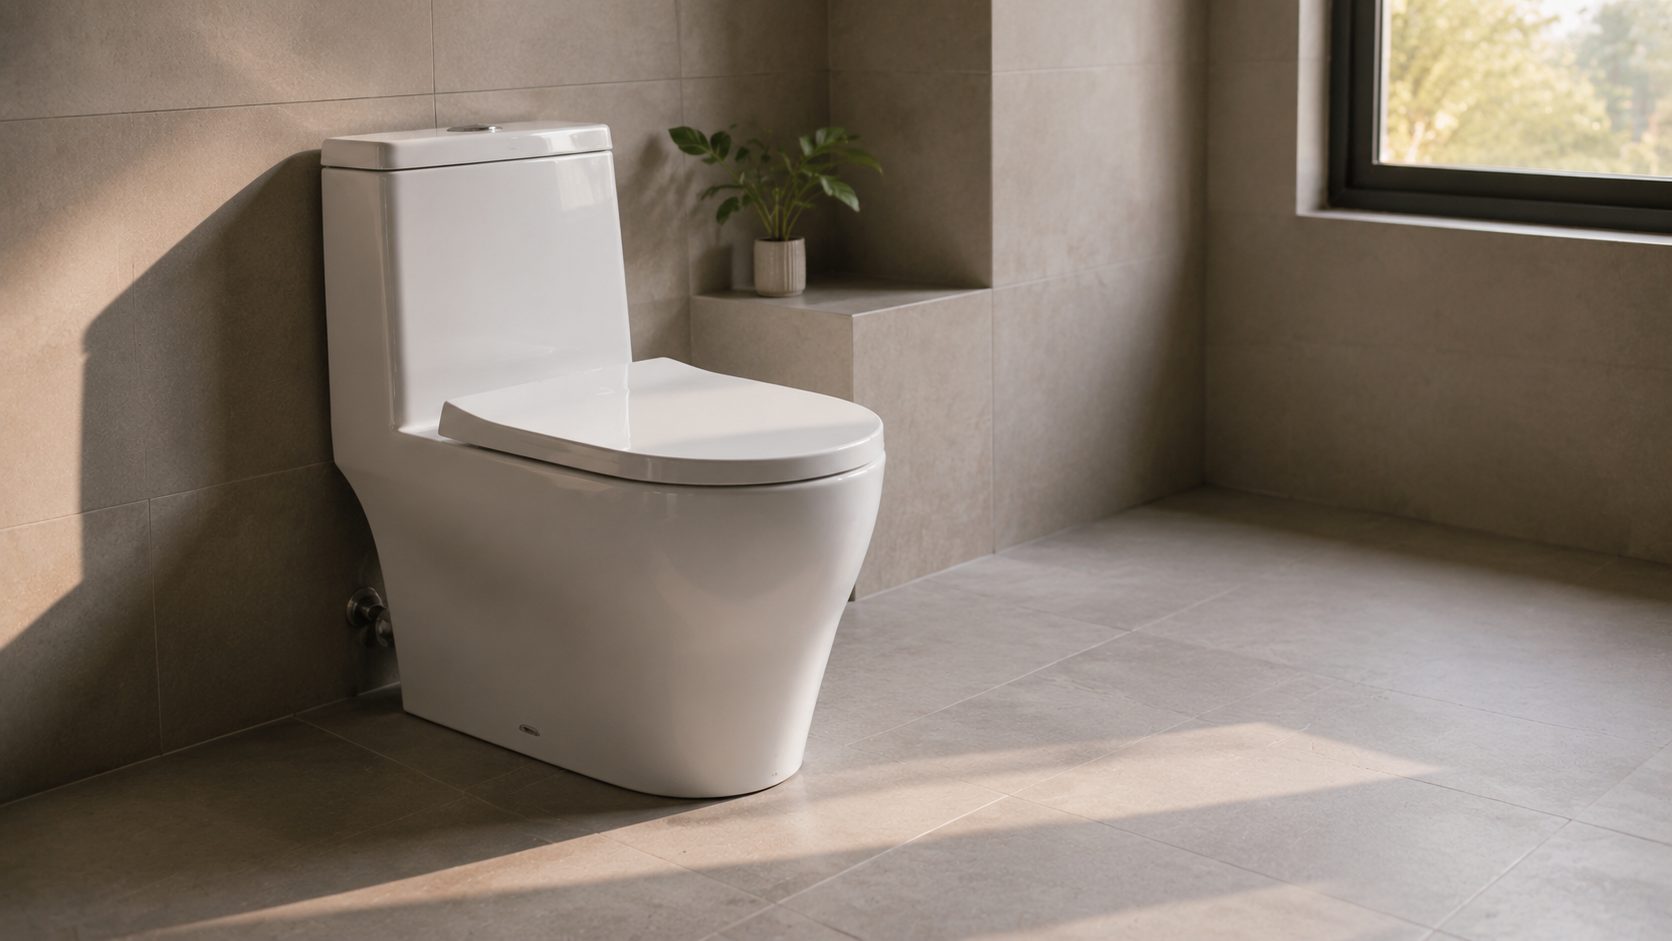
A toilet can be flawless — right shape, right glaze, right price — and still be impossible to install, because the drain in the floor sits 100mm from where the pan needs it. The choice buyers know as S-trap vs P-trap toilet is really one question in two parts: which way the waste leaves the pan, and how far the outlet sits from the wall. That second number has a name — toilet rough-in, or set-out in Australia — and it is the single dimension that decides whether a pan bolts down in ten minutes or the floor has to be opened up again. Get the direction and the distance right on the order and everything after is easy; get either wrong and no amount of quality saves the job. This is a guide to floor-mounted pans — wall-hung is a different animal, and we’ll flag where.
Key takeaways
- S-trap means floor outlet, P-trap means wall outlet. The trap is built into the ceramic body; the letter just tells you which direction the waste goes — down through the floor, or back through the wall.
- Rough-in is measured to the centre of the outlet, from a finished surface. Finished wall for a floor outlet (horizontal), finished floor for a wall outlet (vertical) — measure off bare block or a skirting board and you’ll be out by the thickness of the tile.
- The number changes at the border. China works in 300 / 400mm, North America in 10″ / 12″ / 14″, Australia in set-out millimetres. Tell the factory the market and the exact figure, and always build to the model’s cut sheet, not a generic table.
01 THE SPLIT
S-trap or P-trap: it’s really floor or wall
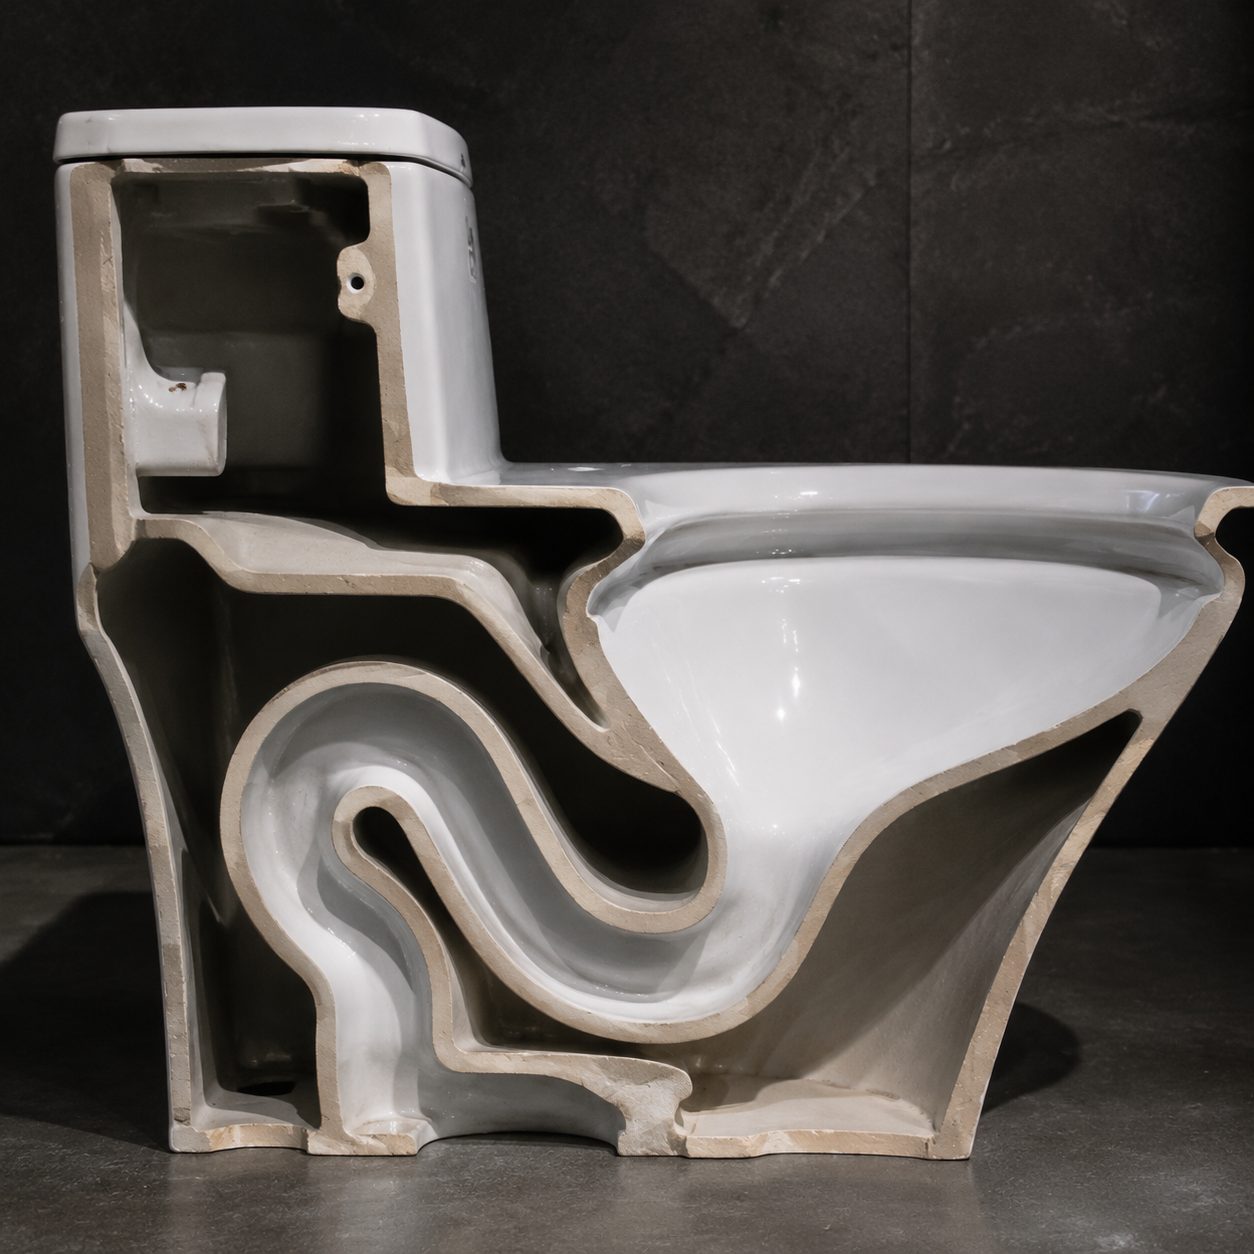
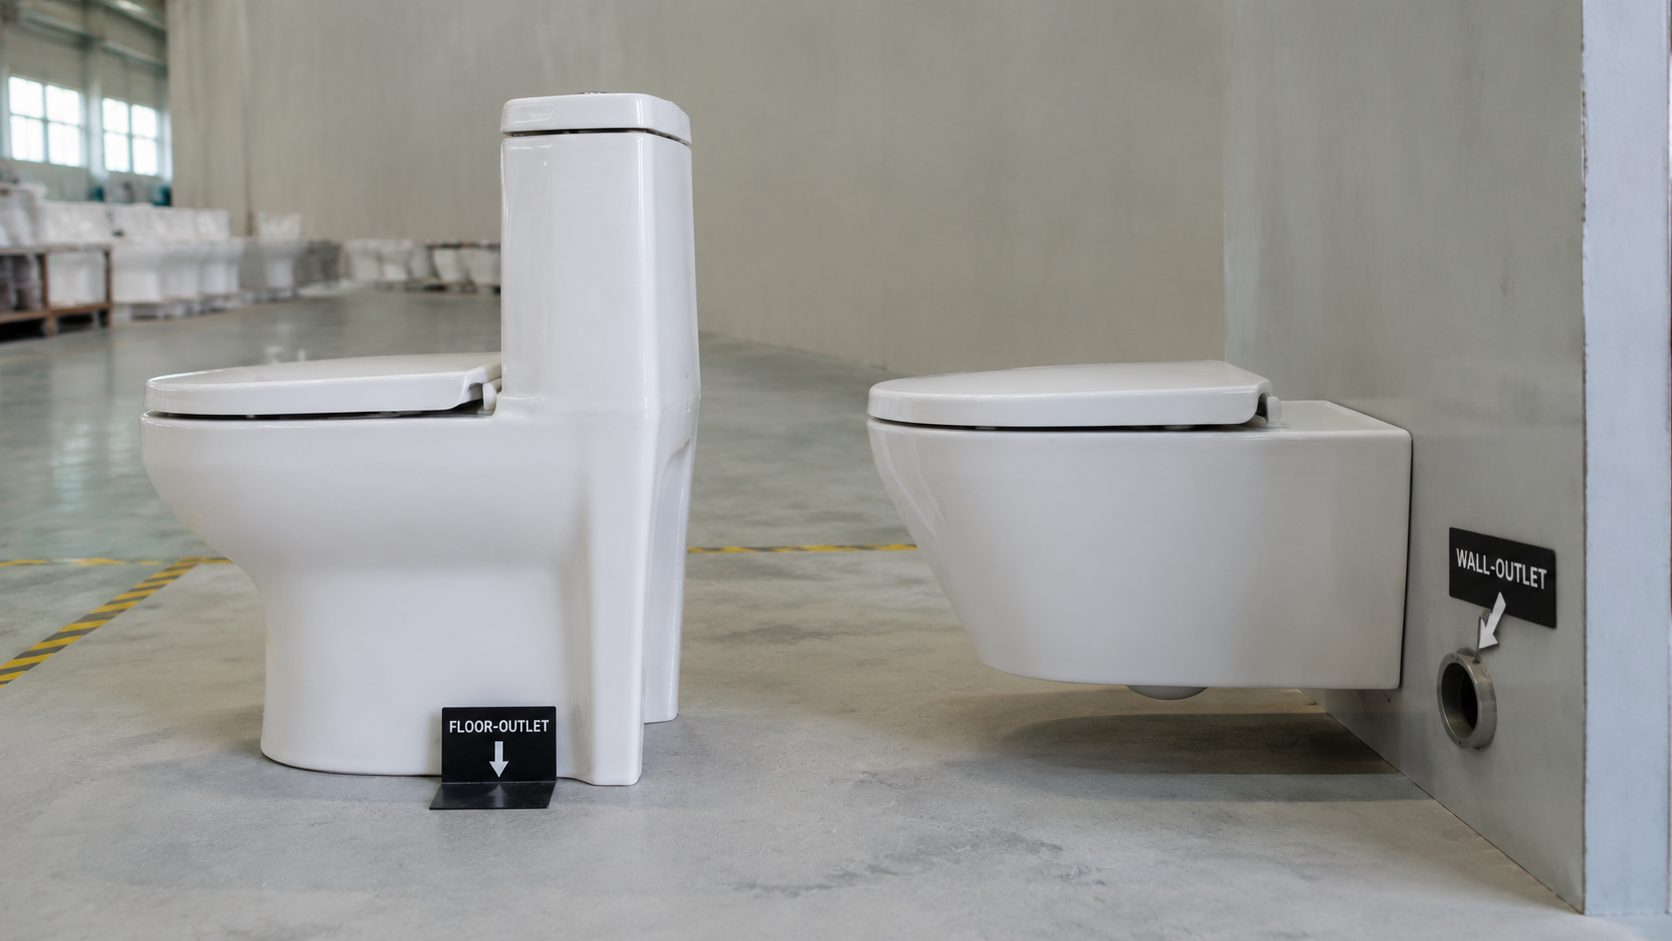
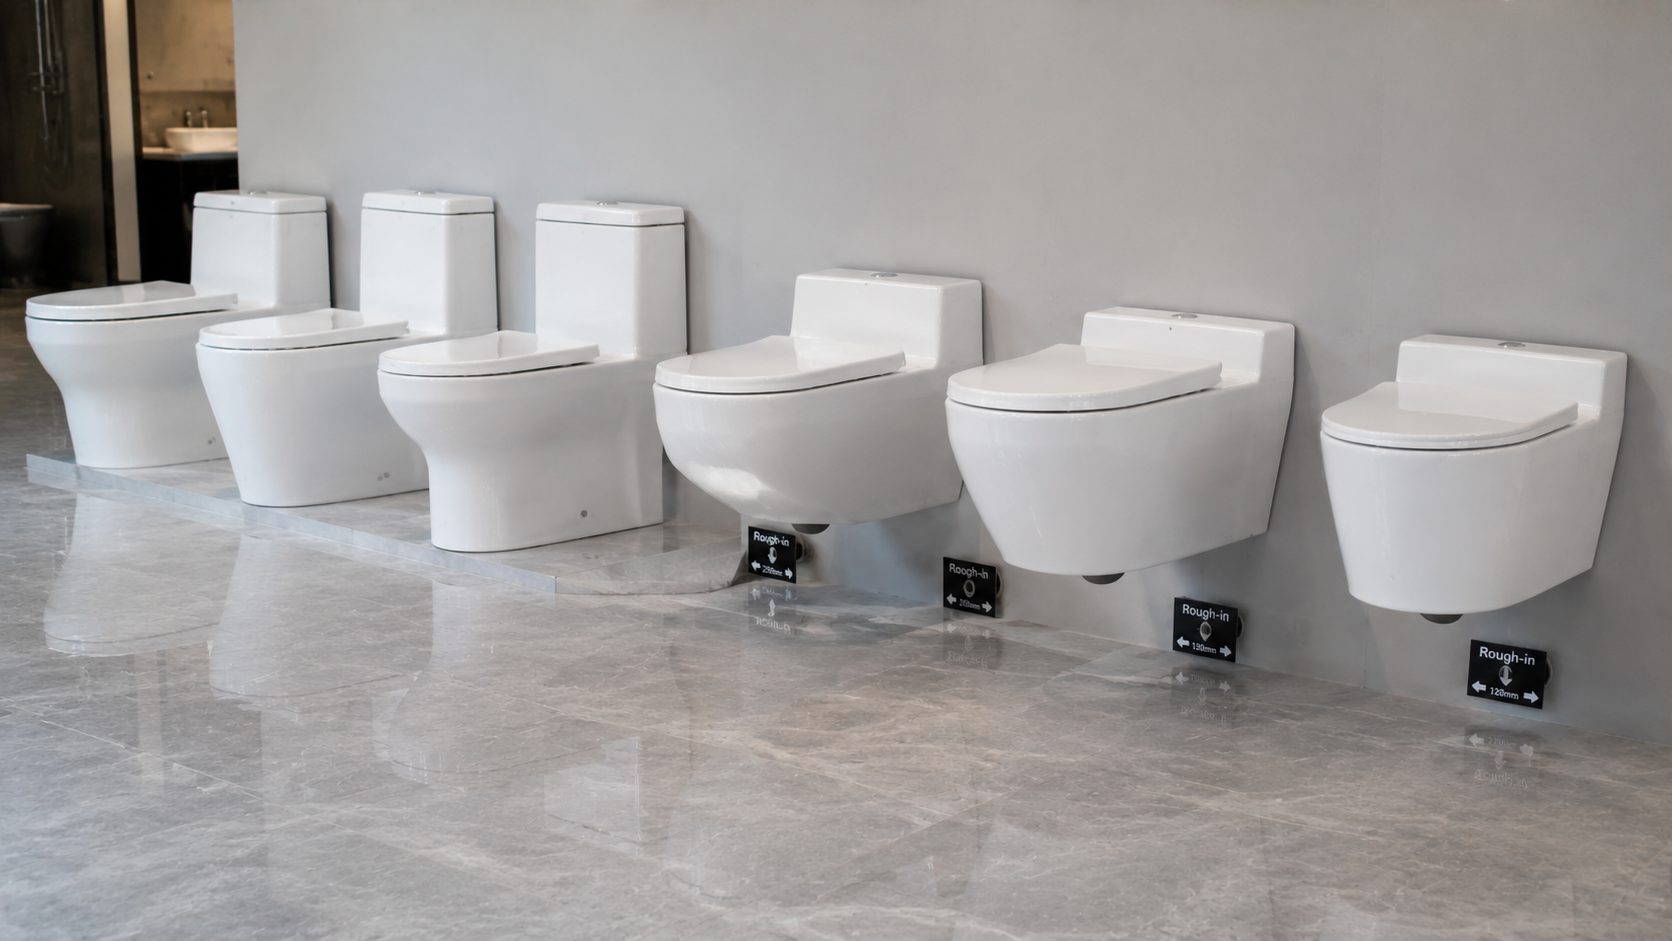
The names S-trap and P-trap describe the shape of the water-holding bend, but for a buyer the useful translation is direction. An S-trap toilet has a floor outlet — the waste drops vertically out of the bottom of the pan into a drain in the floor (called 下排水 or 地排 in China). A P-trap toilet has a wall outlet — also called a rear or back outlet — where the waste runs horizontally out of the back of the pan into a soil pipe in the wall (後排水 / 牆排).
One thing to clear up, because it trips people constantly: the trap here is built into the ceramic body. It is not the loose plastic P-trap you see under a basin. So “P-trap toilet” does not mean a toilet with a separate trap you bolt on — it means a pan whose internal bend is arranged to exit through the wall. If you want to avoid the S/P ambiguity entirely — and on a purchase order you should — write floor outlet or wall outlet. Those two phrases never get lost in translation.
And one myth to retire, because it frightens buyers off perfectly good pans: you may read that “S-traps are banned.” What some plumbing codes restrict is an exposed S-trap fitting under a fixture, because a long unvented drop can self-siphon the water seal dry. A toilet with an S-shaped trap cast inside the ceramic is a different thing, and it is used legally all over the world, China included. Floor-outlet pans are not illegal — don’t let that half-remembered rule steer an order.
Floor outlet (S-trap) vs wall outlet (P-trap)
| Floor outlet (S-trap) | Wall outlet (P-trap) | |
|---|---|---|
| Where the waste goes | Straight down, into a drain in the floor | Back, into a soil pipe in the wall |
| Also called | 下排 / 地排 / bottom outlet | 後排 / 牆排 / rear / back outlet |
| What you measure | Finished wall → outlet centre (horizontal) | Finished floor → outlet centre (vertical) |
| The key number | Rough-in / set-out, e.g. 300 / 400mm | Outlet height above the floor, plus projection |
| Typical where | Most of China, much of Asia, slab-on-grade builds | Apartments and high-rise with in-wall stacks; parts of Europe and Australia |
| Watch out for | Tile thickness quietly eating the rough-in | Getting the height and the projection both right |
02 THE NUMBER
What “rough-in” actually measures
For a floor-outlet pan, rough-in is the distance from the finished wall behind the toilet to the centre of the waste outlet in the floor. Australia and New Zealand call it the set-out, and it is the same idea whichever word is on the drawing. It exists because the pan’s outlet and the drain in the slab have to line up within a few millimetres: the pan is a fixed casting and the drain is set in concrete, so the two must be agreed before either is committed.
That is why rough-in is a purchasing decision, not an installation one. On a floor outlet the drain position is poured into the slab long before the pan arrives; on a wall outlet the soil pipe is built into the wall behind the tiles. By the time the box lands on site, the hole is where it is. A pan bought to match it drops on. A pan bought to the wrong number leaves the installer with two bad options — send it back, or bodge it — and we’ll come to the bodge later.
Direction and distance travel together, so quote both. A wall-outlet pan needs the height of its outlet above the finished floor and how far it projects; a floor-outlet pan needs the horizontal distance from the wall. State one without the other and the factory is guessing at the fixture you actually need.
03 MEASURING
How to measure rough-in without getting burned
Most rough-in mistakes are measuring mistakes, and they come from measuring off the wrong surface. For a floor outlet, put the tape on the finished wall — tiled, plastered, final — and measure horizontally to the centre of the drain or flange. Not the near edge of the pipe, the centre. Two traps here: measuring from bare blockwork before the tiles go on (you lose the tile plus adhesive, often 10–20mm), and measuring from a skirting or trim (a skirting can steal the best part of ¾″ / 19mm and quietly drop a 12″ pan onto an 11¼″ rough-in).
For a wall outlet the logic rotates ninety degrees: measure vertically from the finished floor to the centre of the outlet in the wall, and note separately how far it needs to project. Again, finished floor — count the tile and any screed, because a 12mm tile over 30mm of screed is 42mm the drawing never showed you.
If the old toilet is still there, you can estimate the rough-in without lifting it: measure from the finished wall to the centre of the closet bolts — the caps at the base of the pan, which sit on the drain centre. It won’t be accurate to the millimetre, but it tells you whether you are shopping for a 300 or a 400, a 10″ or a 12″, which is the decision that matters at order time.
Finished surface, centre of the outlet, tiles included
Always measure from the finished wall (floor outlet) or finished floor (wall outlet) — never from bare block, a skirting or an untiled slab — and always to the centre of the outlet, not its edge. Fold the thickness of the tile, adhesive and any screed into the figure. If you send us “400mm” without saying whether the tiles are on yet, we have to ask; if you send “400mm finished, tiles included,” we can cut straight to it.
04 BY MARKET
The numbers change at the border
There is no world rough-in. Each market grew up around its own drainage habits, and the same pan needs a different outlet to sell into each one.
China works mostly in two floor-outlet figures: 300mm and 400mm, with 305, 350 and 450mm turning up on particular models. A trap worth knowing: a 400mm figure is usually the finished distance, so on a bare slab you may measure about 380mm and the remaining ~20mm is the tile you haven’t laid yet. Buy to the finished number, not the rough slab.
North America centres on 12″ (305mm) for floor outlets, with 10″ and 14″ as the common variants for older or tighter layouts — measured, as always, from the finished wall to the centre of the flange. The 10″ catch is the expensive one: a 12″ pan will not sit on a 10″ rough-in, and a house full of 10″ rough-ins is not unusual in older stock.
Australia and New Zealand talk in set-out. For an S-trap (floor outlet) the set-out is the horizontal distance from the finished wall to the centre of the floor waste; newer homes commonly sit around 140–165mm, but older housing can be very different — pre-1980 floors are sometimes 90–110mm or 180–200mm, and there are skew (side-outlet) traps too. For a P-trap (wall outlet) the set-out is the vertical height from the finished floor to the centre of the wall outlet, commonly in the 180–230mm region. These are ranges, not standards: an Australian order without the actual set-out simply isn’t orderable.
The rule under all of it: the binding number is the one on the cut sheet for the exact model, not a market average. We publish a dimensioned drawing per pan for precisely this reason — build to that, not to a table you found online.
Rough-in / set-out at a glance
| Market | Floor outlet (S-trap) | Wall outlet (P-trap) | Measured from |
|---|---|---|---|
| China | 300 / 400mm (also 305 / 350 / 450) | Outlet height varies by model | Finished wall → outlet centre |
| North America | 12″ (305mm) standard; 10″ / 14″ variants | ~7–10″ outlet height (varies) | Finished wall / finished floor → centre |
| Australia / NZ | Set-out ~140–165mm (newer homes) | Set-out ~180–230mm from floor | Finished wall (S) / finished floor (P) |
| Every market | Build to the model’s cut sheet | Build to the model’s cut sheet | Centre of the outlet, tiles included |
05 WHEN IT’S WRONG
Buy the wrong rough-in — and the offset trap
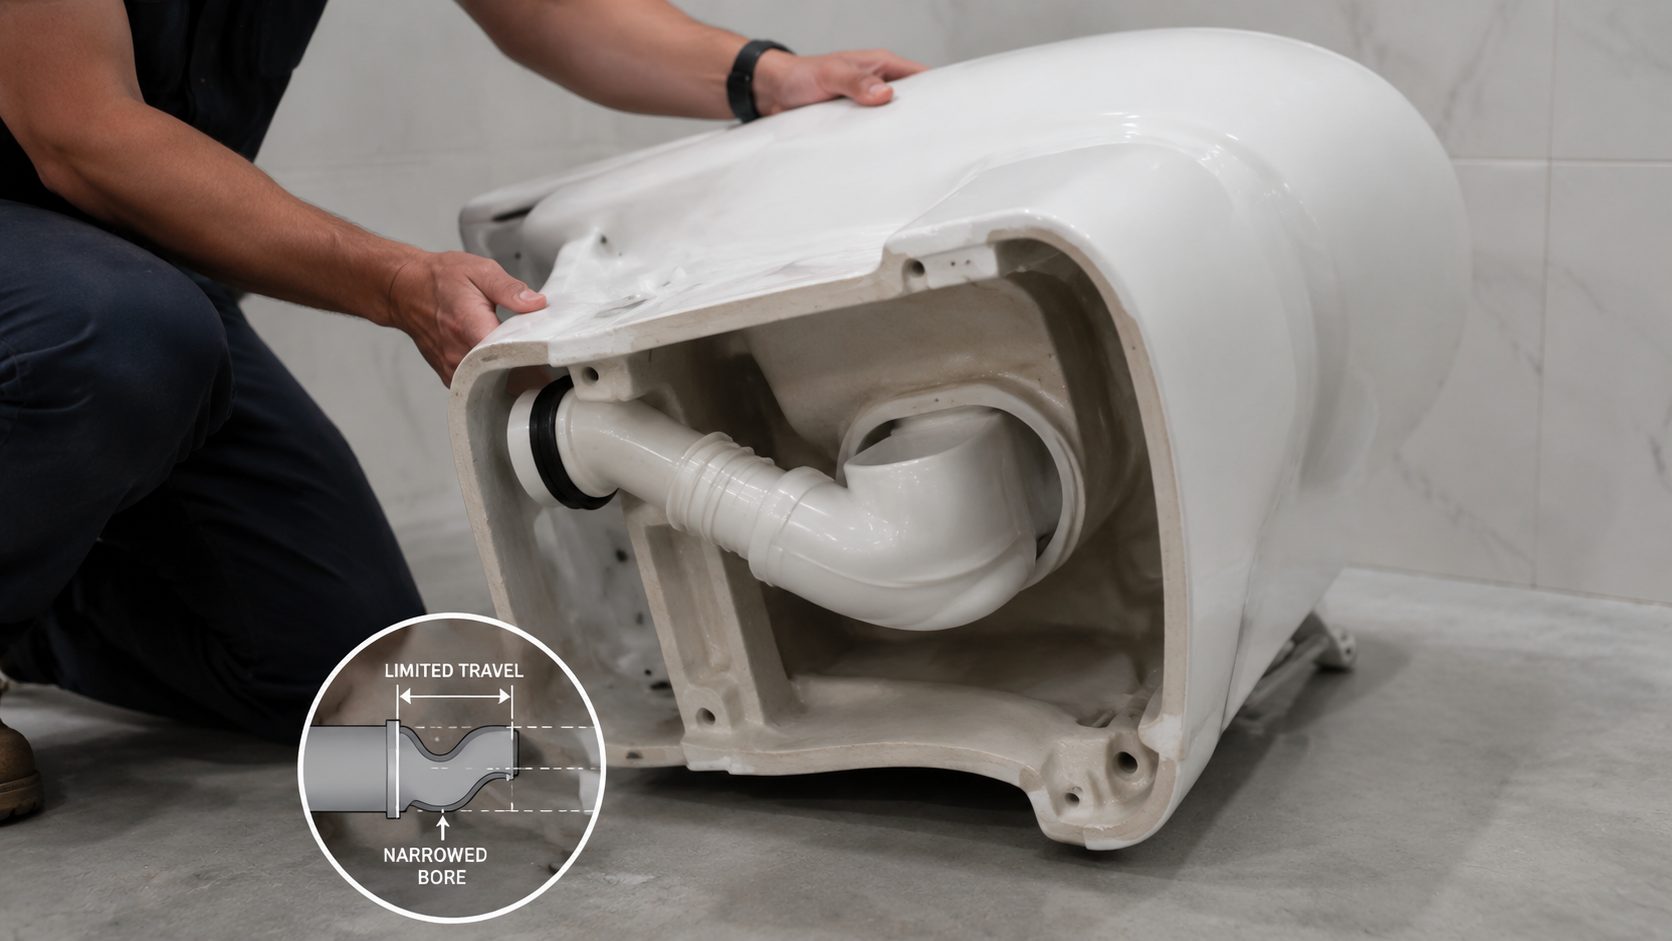
So what happens when the number is wrong? Two failure modes. Too big a mismatch and the pan simply won’t bolt down over the drain. A small mismatch is the more dangerous one, because it looks installable: the pan goes down, but its outlet doesn’t seat squarely on the drain, and you get a slow leak or a sewer smell weeks later, once the wax ring or seal has been stressed.
The rescue is an offset — an offset flange or eccentric fitting in North America, an offset pan connector in Australia, a 移位器 in China. Australia has 20mm and 40mm offset connectors and trimmable bendable ones that bridge roughly a 90–160mm range; North America has offset closet flanges. They do work, and sometimes there is no choice. But treat them as a repair, not a plan, because each carries a cost. An offset gives you a fixed, small shift, so it cannot turn a 300 into a 400. Many offsets neck the waterway down, which cuts flush force and invites blockages in exactly the fixture you least want to unblock. And every extra connector is another joint that can weep — hidden behind the pan, where you can’t watch it fail.
An offset connector is what you reach for when the slab is already poured wrong. It is never what you design to. Matching the pan to the real rough-in beats correcting for the wrong one, every single time.
Before you count on a 移位器
An offset buys you a few centimetres, not a free choice of pan. It can narrow the waterway, weaken the flush and add hidden joints behind the ceramic. If you are specifying from scratch — a new build, a fit-out, a container of pans for a project — order the rough-in that matches the site, and keep offsets for the one awkward bathroom where the concrete genuinely can’t be moved.
06 THREE AXES
Outlet position isn’t flush, and it isn’t one-piece
Rough-in gets tangled with two other toilet decisions that are completely separate, and untangling them saves a lot of crossed wires on an order. Outlet position is one axis; it does not decide the other two.
The first is how the toilet flushes. Siphonic and washdown describe the mechanism that clears the bowl, not where the waste leaves — a washdown pan and a siphonic pan can each be built as a floor outlet or a wall outlet. Choose the flush on performance and water use, choose the outlet on the plumbing; neither dictates the other. We cover the flush side in siphonic vs washdown toilets.
The second is one-piece vs two-piece. That is the tank-and-bowl structure, and it is independent of the outlet too: one-piece and two-piece pans both come in floor- and wall-outlet versions. If it helps to keep them straight — outlet position is where the waste goes, flush type is how the bowl clears, and one/two-piece is how the tank sits. Our one-piece vs two-piece toilet guide covers that last axis. A clean order names all three, because a factory can’t infer one from another.
07 WALL-HUNG
Wall-hung toilets play by different rules
Everything above is about a pan that sits on the floor. A wall-hung toilet changes the game: the bowl cantilevers off the wall, the cistern is a concealed in-wall tank, and the whole load is carried by a steel carrier frame fixed inside the wall. The waste runs back into the wall, so it is a wall-outlet arrangement by nature — but the numbers that matter are the frame’s: the height of the waste and water connections built into the carrier, and the bolt spacing the pan hangs on, not a floor rough-in.
So a wall-hung project is set out against the frame, and the frame has to be chosen and built in before the wall closes — the same discipline as a floor rough-in, with more to get right. We keep that detail in its own guide, the wall-hung toilet installation guide. For the rest of this article, assume a floor-mounted pan.
08 ORDERING
What to tell the factory before you order
An enquiry that lands with the outlet direction and the rough-in already stated turns into a quotation the same day. One that arrives as “toilet, 500 units” turns into a week of questions. Here is the short list that removes the questions.
Put these on the order
Destination market; floor outlet (S-trap) or wall outlet (P-trap); the rough-in or set-out in mm or inches, stating whether it is the finished figure with tiles included; for a wall outlet, the outlet height above the finished floor and the projection; one-piece or two-piece; the flush type you want (siphonic or washdown); and any market water-seal or flush-volume rule you are bound by. Then let us build to the model’s cut sheet, not a generic rough-in table.
As a Chaozhou ceramic sanitary ware factory — not a trading company — we cast floor-outlet and wall-outlet pans, one-piece and two-piece, in the rough-ins each market actually uses, and adapt them for OEM and ODM buyers; how that private-label work runs is set out in our OEM and ODM bathroom products guide. Once the outlet and rough-in are fixed, the rest of the order is logistics: how the pans pack and load sits in our 40HQ container loading guide, timing and minimums in MOQ and lead times, and a pre-shipment check belongs in the plan too — see inspecting sanitaryware before shipment.
Send us the market and the rough-in — or a photo of the drain and the old pan if you are not sure — and we’ll match the outlet, send the cut sheet and quote. WhatsApp +1 213 216 0960.
The rough-in is the cheapest thing to get right and the most expensive thing to get wrong. Decide floor or wall first, measure to the centre of the outlet from a finished surface, match the number to the market you are shipping to, and put it on the order in writing. Do that and a container of toilets lands straight on the drains waiting for them — which is the entire point.
FAQ COMMON QUESTIONS
Frequently asked questions
What is the difference between an S-trap and a P-trap toilet?
The letters describe the shape of the built-in trap inside the ceramic, but for a buyer they mean direction. An S-trap toilet is a floor outlet: the waste drops vertically out of the bottom of the pan into a drain in the floor. A P-trap toilet is a wall outlet, also called a rear or back outlet: the waste runs horizontally out of the back of the pan into a soil pipe in the wall. The trap is cast into the pan itself, not a separate fitting like the plastic P-trap under a basin. To avoid confusion on an order, write "floor outlet" or "wall outlet" rather than S or P.
What is toilet rough-in, and how do I measure it?
Rough-in (called set-out in Australia and New Zealand) is the distance from the finished wall to the centre of the waste outlet, for a floor-outlet pan. Measure horizontally from the finished, tiled wall to the centre of the drain or flange — not from bare blockwork and not from a skirting board, and to the centre, not the edge. For a wall outlet, measure vertically from the finished floor to the centre of the outlet instead. Always include the thickness of the tile, adhesive and any screed, and if an old toilet is still fitted you can estimate by measuring to the centre of the closet bolts.
China 300mm vs 400mm rough-in — how do I choose?
300mm and 400mm are the two common floor-outlet rough-ins in China, with 305, 350 and 450mm on some models. You don't choose freely — you match the drain that is already in the floor. Measure from the finished wall to the centre of the floor outlet and buy the pan that fits it. Note that a 400mm figure is usually the finished distance, so on a bare slab you may read about 380mm with the remaining ~20mm being the tile not yet laid. Buy to the finished number, not the rough slab.
What does a 12-inch rough-in mean, and what about 10" and 14"?
In North America the rough-in is the distance from the finished wall to the centre of the toilet flange, and 12 inches (305mm) is the standard for floor-outlet pans. 10 inches and 14 inches are the common variants, usually found in older or tighter layouts. They are not interchangeable: a 12-inch pan will not sit on a 10-inch rough-in. Measure from the finished wall — not a baseboard, which can steal around three-quarters of an inch — and confirm the figure against the specific model's cut sheet before ordering.
Can I fix the wrong rough-in with an offset connector or 移位器?
Sometimes, but treat it as a repair, not a plan. An offset flange, offset pan connector or 移位器 shifts the outlet by a fixed, small amount — Australian offset connectors are commonly 20mm or 40mm, with trimmable types bridging roughly 90 to 160mm — so it cannot turn a 300 into a 400. The trade-offs are real: many offsets narrow the waterway, which weakens the flush and invites blockages, and every extra joint is another hidden leak point behind the pan. Matching the pan to the actual rough-in is always better than correcting for the wrong one.
Is a wall-hung toilet's waste the same as a floor-mounted one?
No, and it is worth keeping separate. A wall-hung toilet cantilevers off the wall on a concealed steel carrier frame, with a hidden in-wall cistern, and the waste runs back into the wall. It is a wall-outlet arrangement, but the numbers that matter are built into the frame — the connection heights and the bolt spacing — not a floor rough-in, and the frame must be chosen and built in before the wall closes. Everything in this article assumes a floor-mounted pan; for the wall-hung case see our wall-hung toilet installation guide.